
Composting at home: the practical beginners' guide nobody gave you
Your kitchen bin smells like something died in it. You've got a balcony the size of a bath towel, no garden, and a vague guilt about the bag of vegetable scraps you throw out every week. So you type "composting at home" into a search bar and get twelve articles telling you it's "easier than you think" without ever telling you what to do when it starts smelling like ammonia at 11pm on a Tuesday.
I know that 11pm smell. My first compost bin was a plastic bucket with holes drilled into the lid, sitting on a Paris balcony in full sun. It went anaerobic within nine days. The liquid that leaked out killed a rosemary plant I'd kept alive for two years. That was my introduction to composting at home, and it's why I'm writing this instead of another cheerful list of "greens and browns."
Here's the honest version: composting works, it's cheap, and it will fail at least once before it works. What follows is what I actually learned, including the parts that went wrong.
Key Takeaways
- Balcony, kitchen counter, or backyard—there's a method that fits your space, but each one has a failure mode you need to know about in advance.
- The single most common beginner mistake isn't the wrong ingredients. It's the wrong moisture level, and it's fixable in about two minutes.
- Expect finished compost in two to four months in a warm climate, longer in cold weather. Anyone promising a week is selling you something.
- If your bin smells bad, it's almost always too wet or too compacted. Add dry material, turn it, and the smell disappears within 48 hours.
- For apartments, worm composting is quieter and smaller than most people realize—but it has one hard limit that you need to respect.
What composting at home actually requires
Strip away the jargon and composting is decomposition with better management. Bacteria, fungi, and invertebrates eat your food scraps. The only thing you're doing is keeping them comfortable enough to work fast.
That's it. You're not building soil. You're running a very small, very low-maintenance cafeteria.
The four conditions your pile needs
Microbes need four things in the right proportion. Get three and the fourth will get out of balance and tell you loudly.
- Carbon (brown stuff: dry leaves, cardboard, shredded paper, straw) — the energy source.
- Nitrogen (green stuff: vegetable peels, grass clippings, coffee grounds) — the protein that drives growth.
- Oxygen — without it, you get anaerobic bacteria, which produce the rotten-egg smell.
- Water — enough to feel like a wrung-out sponge, not enough to drip.
The green-to-brown ratio gets quoted constantly as 1:2 by volume, and I've found that a useful starting point rather than a rule. In wet climates I lean closer to 1:3. In dry heat, 1:2 works fine. What matters more is how it feels in your hand.
What you can and cannot compost
Most beginner guides list the same ingredients and skip the reasoning. Here's the reasoning.
Cooked food, meat, dairy, and oily leftovers attract rodents and create the worst smells—not because they can't decompose, but because they decompose too fast relative to the surrounding material, turning the pile acidic and wet. Plastic labeled "compostable" usually requires industrial temperatures your backyard pile will never reach. I tested this once with a "compostable" coffee cup: it sat in my bin for six months looking exactly the same. Six months.
What works reliably: fruit and vegetable scraps, coffee grounds and filters, eggshells, tea bags (check for plastic mesh), grass clippings, dry leaves, shredded plain cardboard, sawdust from untreated wood.
Which composting method fits your space
The method matters far less than people think. The space you have determines everything.
| Method | Space needed | Realistic time to finished compost | Main downside |
|---|---|---|---|
| Open pile | At least 1 m² of ground | 3–6 months | Needs turning; visible to neighbours |
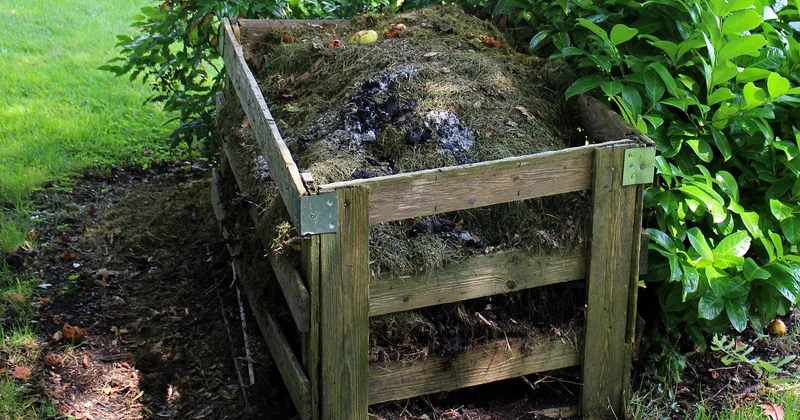
| Enclosed bin | 0.5 m², any surface | 2–4 months | Can go anaerobic if you forget to aerate |
| Tumbler | Balcony-sized footprint | 4–8 weeks with active management | Small capacity; easy to overfill |
| Worm bin (vermicompost) | Under a kitchen counter | 2–3 months for castings | Worms die if the bin freezes or overheats |
| Bokashi | Countertop, sealed bucket | 2–4 weeks to ferment, then needs burying | Not composting—it's fermentation, and needs a second step |
A detail that surprised me: the tumbler produced finished compost faster than my open pile for the first two months, then stalled completely because I'd overfilled it. A tumbler works best when two-thirds full. Beyond that, there's no air movement and the whole thing turns into a wet brick.
Can you compost without a garden?
Yes, and worm composting is the method I'd point you toward. A well-run worm bin holds roughly 1 kg of food scraps per week for a bin the size of a storage crate. It doesn't smell if you get the moisture right, and it produces finished castings in about 60 to 90 days.
The hard limit: worms are living animals. Below about 5°C they slow down or die, and above 30°C they try to escape. If your balcony regularly hits either extreme, a worm bin is not the right choice—a sealed bokashi bucket on the counter is.
How to make compost at home with kitchen waste
This is the part where most people quit, and it's rarely because of the science. It's because of the daily friction.
Set up a workflow, not a system
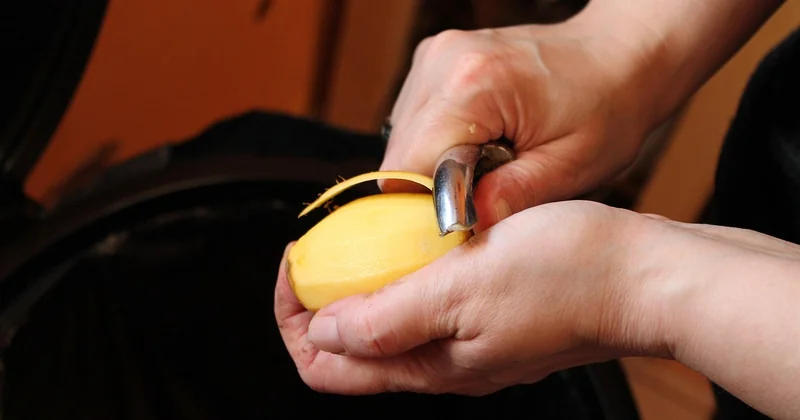
What changed my results wasn't a better bin. It was a small countertop container I empty every two days. If scraps sit longer than that in summer, they start fermenting before they reach the pile, and you're adding an acidic mess instead of fresh material.
My routine, which took about three weeks to become automatic:
- Keep a 2-litre container with a lid next to the sink. Line the bottom with a handful of shredded cardboard—it absorbs the liquid that would otherwise pool.
- Empty it into the main bin every two days, always covering the fresh scraps with a layer of browns.
- Turn the pile once a week in warm weather, every two weeks in winter.
- Check moisture every time you turn. Squeeze a handful. If it drips, add browns. If it crumbles, add water.
Step 2 is the one people skip. Covering fresh material is what keeps fruit flies from finding your bin, and it takes four seconds.
The mistake I made for eight months
I added grass clippings in thick layers. Grass is high in nitrogen and compacts into an airtight mat within hours. My pile went anaerobic underneath, and the smell was genuinely remarkable—sweet and rotten at the same time.
The fix: mix grass clippings into the pile rather than layering them, and never add more than a thin scattering at once. Or spread them on the lawn and let them break down there.
Troubleshooting: symptoms, causes, and fixes
Every problem you'll hit has a specific cause. None of them require starting over.
| Symptom | Most likely cause | Fix |
|---|---|---|
| Rotting, ammonia or sulphur smell | Too wet, too compacted, not enough oxygen | Turn the pile, add dry browns, leave the lid off for a day |
| Fruit flies | Fresh scraps exposed on the surface | Bury new scraps under 5 cm of browns; empty your kitchen container more often |
| Pile is warm but nothing is decomposing | Too dry | Add water while turning until it feels like a wrung-out sponge |
| Nothing is happening at all, and it's cold | Low temperature slows microbial activity | Insulate the bin with straw bales or accept a winter pause |
| Rodents or larger animals | Meat, dairy, or cooked food in an open pile | Remove those inputs; switch to an enclosed bin with a secure lid |
Nine times out of ten, the answer to a smell problem is oxygen. Nine times out of ten, the answer to "nothing's happening" is water.
How long does it take, and how do you know it's done?
Nobody can honestly give you a fixed number, because decomposition speed depends on temperature, moisture, particle size, and how often you turn the pile.
What I can give you is a range I've seen hold up across hot summers and cold winters: two to four months for a well-managed bin in warm conditions, up to six months if you're turning rarely or the weather is cool. A tumbler turned every two days hit finished compost in about seven weeks in July. That's the fastest I've managed, and I've never come close in January.
How to tell compost is ready
Three signs, and you want all three:
- It looks like dark, crumbly soil—no recognizable food scraps or leaves.
- It smells earthy, like a forest floor after rain. If it smells sour, it isn't finished.
- It has cooled down. Active compost runs warm; finished compost sits at ambient temperature.
You don't need to test pH or buy a thermometer, whatever you read elsewhere. Your nose and your hands tell you everything.
A note on rules, neighbours, and apartment life
Local regulations vary enormously, and this is one area where you should check before you build rather than after. Some municipalities restrict open piles near property lines. Many apartment leases prohibit anything on balconies that could be considered a nuisance, and "nuisance" is often defined loosely enough to cover a bin that smells.
Practical approach: if you're renting or in a shared building, choose a sealed system—tumbler or bokashi. Odour is the single thing that turns a neighbour into a complaint, and sealed systems eliminate it almost entirely.
I lost a rosemary plant and one very patient neighbour's goodwill to an open bucket. A 40-euro tumbler would have prevented both.
Start small. One bin. One routine. Learn what your climate and your scraps actually do together, and adjust from there. The first batch will probably be imperfect, and that's fine—you'll still end up with something dark and crumbly that your plants will visibly respond to within a few weeks.
The bag of scraps you're about to throw away is the raw material for it. The only real question is whether you'd rather keep buying soil in plastic sacks from a garden centre, or spend four seconds covering your kitchen container every evening.


